


 Copy link
Depending on the version, there may be an incompatibility between Adobe Acrobat and the new idCAT certificate technology, which could cause errors when signing. The idCAT certificate is correct and valid, but Adobe does not yet fully support its technology.
Temporarily, until Adobe resolves this, it is recommended to sign PDFs using the option in this article "Sign by directly selecting the digital certificate file (.pfx)" or do so with other tools such as SignaSuite from AOC.
Below we explain the options you have available to sign with idCAT Certificat from Adobe Acrobat.
Sign by selecting the digital certificate installed in the computer's certificate repository
IMPORTANT:
To be able to sign a PDF document from the option “Sign by selecting the installed digital certificate” it is necessary to have a digital certificate installed on your computer, such as the idCAT Certificat. Remember that the idCAT Mòbil is not a digital certificate.
The certificate is already installed on your computer or browser (Windows / macOS). The Adobe Acrobat application automatically finds it in the system certificate store.
With the idCAT Certificate installed on your computer, open the PDF with Adobe Acrobat (Reader or DC) and follow the following steps:
1. Go to "Tools" or "All Tools" and select "Certificates" or "Use a Certificate":

If you can't find it, you can also search using the magnifying glass:

2. Select “Digitally Sign” and accept the dialog box
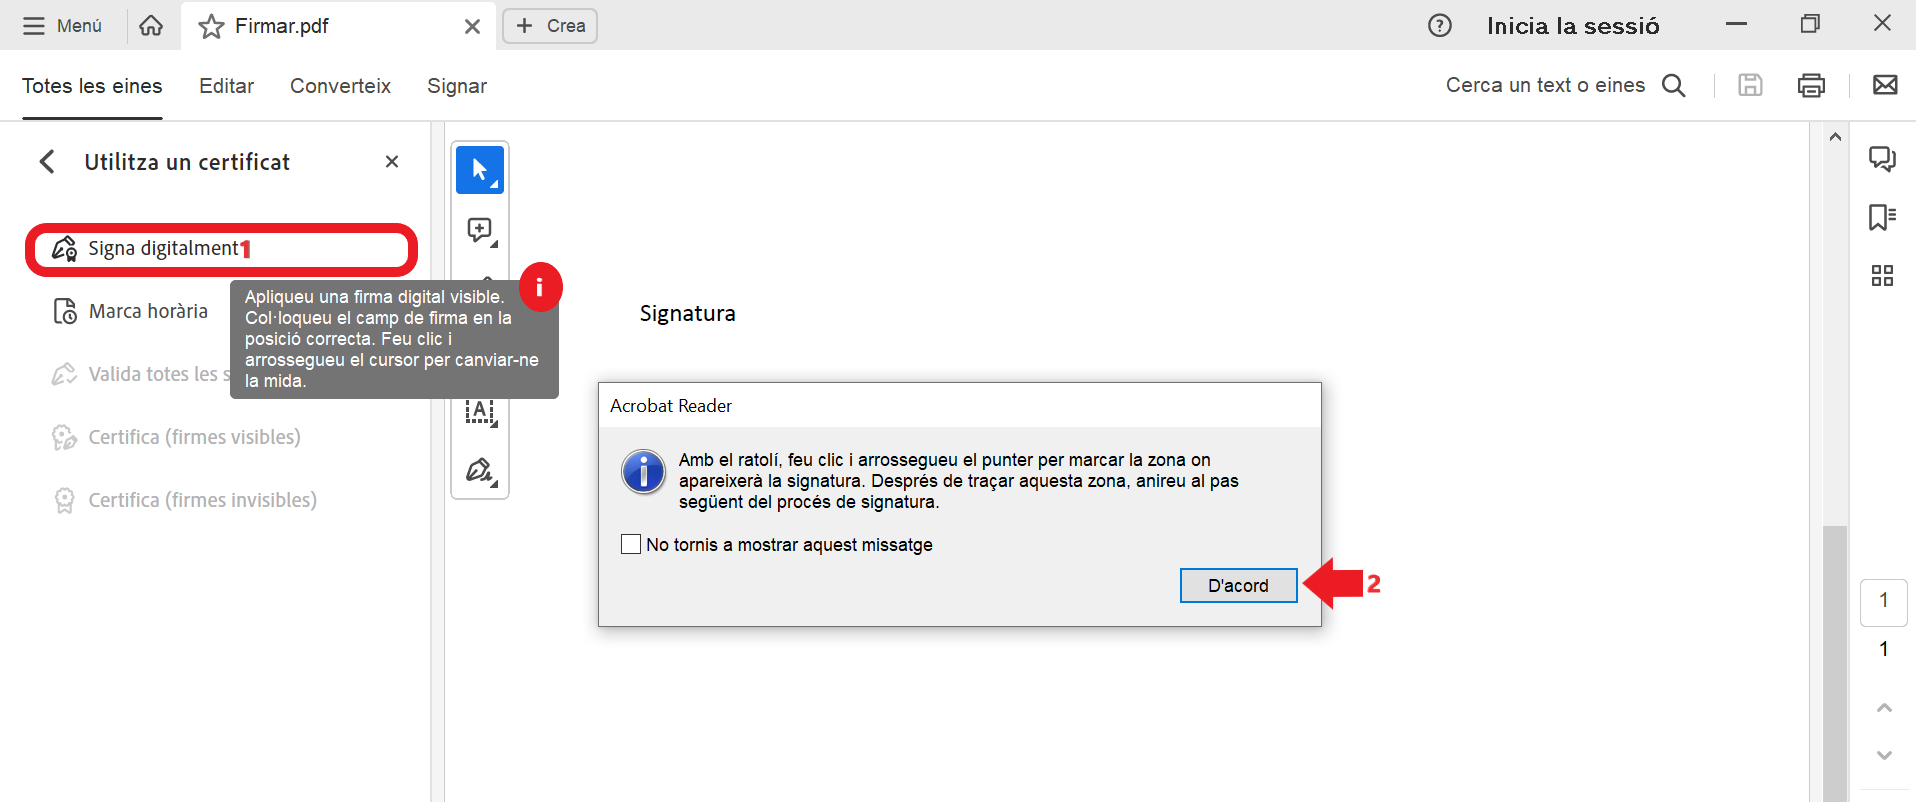
3. Select the space where you want to insert the signature, by dragging the mouse across the document.

4. Select below your idCAT certificate with which you want to sign:

5. Finally, the signature will look like this:

IMPORTANT:
To be able to sign a PDF document, you need a digital certificate such as the idCAT Certificat. Remember that the idCAT Mòbil is not a digital certificate.
The certificate is NOT installed on the system. It is saved as a file (usually .pfx) in a folder on your computer, USB, external drive, etc.
With the .pfx file of the idCAT certificate saved on your computer, open the PDF with Adobe Acrobat (Reader or DC) and follow the following steps:
1. Go to "Tools" or "All Tools" and select "Certificates" or "Use a Certificate":
If you can't find it, you can also search using the magnifying glass:
2. Select “Digitally Sign” and accept the dialog box
4. Then select “ Set up new Digital ID ”
5. Then select “Use a digital ID from a file ”
6. On the next screen you must search for the file of your idCAT certificate (.pfx) that you have saved on your computer (desktop, downloads, documents, etc.) and indicate the password which is the management code* and click on continue .
*If you don't remember the management code, access the recovery link and we will send you the code to the certificate address.
7. Select your certified idCAT that will appear on the screen and continue.
8. Your idCAT certificate that you just configured will appear and click continue:
9. Finally your signature will look like this:
Additionally, we explain how to hide the DNI from the signature image in the PDF if you wish. According to regulations, the CommonName field of the certified idCAT must contain both the full name and the DNI, but it can be hidden from the stamp that is stamped on the document, although it will always be visible from the signature properties.
Hide the ID from the signature image in the PDF
If you want to hide the DNI when signing a PDF, you must also hide the name and surname, as they are included in the same CN field (Name, Surname and NIF). Likewise, the CN field can always be seen by consulting the properties of the document's signature.
To hide the CN field, follow these steps:
1. Go to the “All Tools” section and select “Use a Certificate”:
2. Make a box where you want to sign.
3. Choose the certificate you want to sign with and click “Continue”.
4. A screen will appear showing how the signature to be created will look. At this point, click “Create” to generate a new signature appearance.
5. Then, mark the signature aspect as “None” (this is only a recommendation for better visualization of the signature) and uncheck the box that says “Name”, so we will uncheck the CommonName field where the DNI appears.
6. When you save the signature, it will look like the one below: