


 Copy link
The components are the following:
? Page : static pages with multi-language support.
? Meetings : face-to-face meetings, that is, face-to-face events included in a process. They can be debate sessions, information sessions, etc.
? Proposals : written contributions from users to the platform, which may be the subject of a decision.
? Budgets : specific module to deploy a participatory budgeting process. Allows you to determine the minimum percentage of the total budget to support the projects presented.
? Surveys : to conduct surveys.
? Monitoring: to monitor the proposals.
? Debates : for discussions. We recommend not using it, since the proposals functionality is similar and, in addition, it allows the traceability of the proposals.
To configure the features, click Components in the process submenu. A list appears with the components that have already been configured by the process: the Component Name and the Type that was used to create it (Figure 1). From this list, through the icons, the following actions can be performed: Manage , Publish / Unpublish , Configure , configure Permissions and Delete .

Fig. 1. Component management
To configure a new component, click Add component in the upper right part of the window and select the type of component you want to configure in the drop-down (Figure 2).

Fig. 2. Component management
These are pages that you can edit with the information you want.
To add a page, click Page in the Add Component drop-down (Figure 3).
The Add Component: Page window opens, the fields must be filled in (Figure 4):
? Name : name of the page.
? Weight : corresponds to the order in which the components (in this case, the page) are displayed in the participatory process menu. The more weight, the further to the right.
? Global settings : (only if you want to display a Notice on the Page ) write the content of the message.
? Phase configuration: ( only if you want to display a Notice on the Page during the execution of a phase) write the content of the message in the phase in which it should be output.

Fig. 3. Add page

Fig. 4. Edit page
To add in-person events, you must first configure the Meetings component. In the Add component drop-down list, click Meetings , which opens the Add component: Meetings window (Figure 5).
You must give the meeting a Name , select the Order (position in the process menu), and write the notices , if applicable, in Global Configuration and Phase Configuration , and mark (by clicking) Comments enabled/blocked so that the process participants can comment on the meetings. Then, click Add component .
Once the Meetings component is configured, specific meetings can be created. In the submenu on the left of the participation process, under Components , click the name you gave the component. The Meetings window opens, with the list of meetings that have been previously created (Figure 6).

Fig. 5. Encounters Component

Fig. 6. List of encounters
From this window, by clicking on the icons you can perform the following actions:
- Preview how the meeting publication will look like
- Edit
- Registration Settings
- Close the meeting once it is done.
- Attach files
- Delete (delete the meeting).
To create a meeting, click New in the upper right of the meetings window (Figure 6). The Create Meeting window opens.
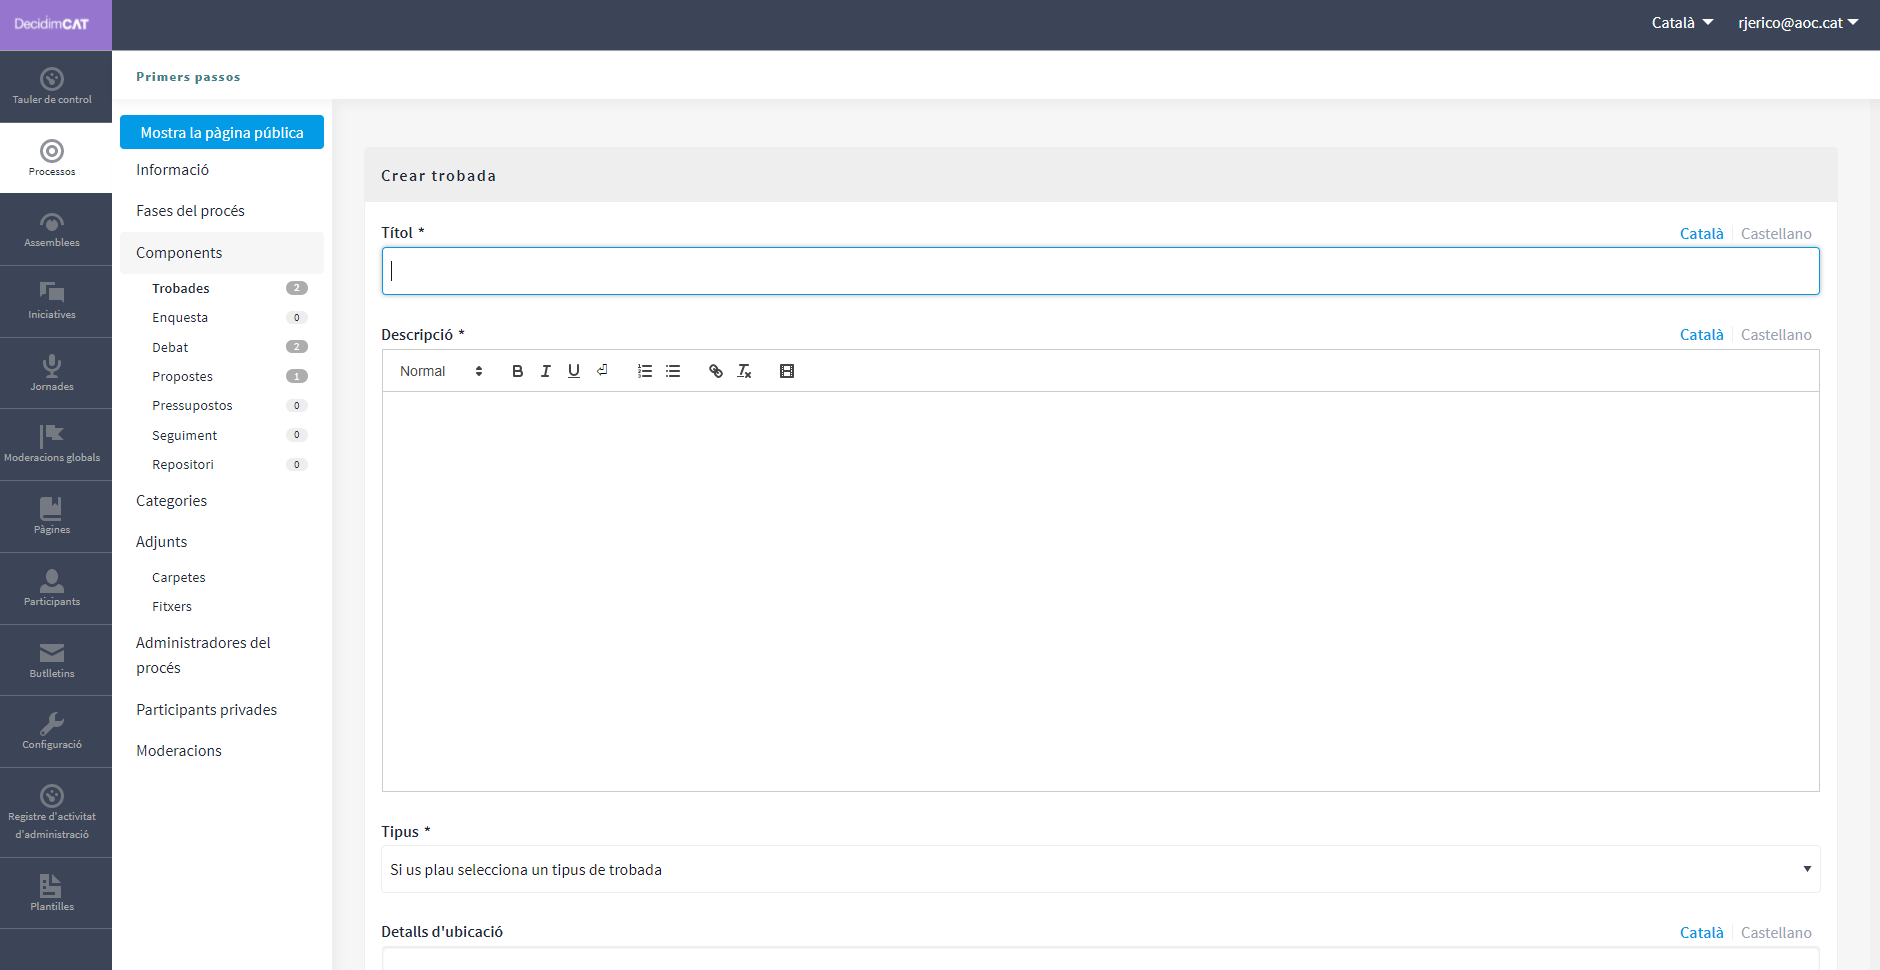
Fig. 7. Create meeting
The information that must be edited when creating a meeting is (Figure 7):
- Title
- Description
- Address : street name, number, postal code, city
- Location : name of the building, room where it will be held...
- Location details : if applicable, how to get there, apartment, block, etc.
- Start time and End time : select the date and times in the calendar that appears by clicking inside the field.
- Category to : If applicable, select the category from the dropdown.
To activate registrations for the meeting, in the Meetings window (Figure 7), click the Registrations icon. The Registrations window opens (Figure 8), in which you must click Registrations enabled , select the available capacity in the Registrations available for the meeting drop-down list (leave it at 0 if the available spaces are unlimited), and write the Registration Terms in the corresponding field. When finished, click Save . From this window, you can export the registrations in CSV, Excel (XLS) or JSON formats by selecting the format in the Export drop-down list.

Fig. 8. Enable registrations
If you want to attach a file to the meeting information, in the Meetings window, click the Attachments icon. The Attachments window opens, where a list will appear if there are other attached files and from which you can Edit or Delete the attached files.
Click New/ to attach a file. Then, in the New Attachment window, type the Title and Description , upload the file (by clicking Browse to File ), and click Create Attachment (Figure 9) .

Fig. 9. Create attachment to meetings
To configure the Proposals functionality, in the process submenu , click Components , then click Add Component in the upper right part of the window and select Proposals . The Add Feature: Proposals window opens (Figure 10). The information that must be entered when configuring the proposals component is:

Fig. 10. Create proposals
? Name
? Weight: the order in which the Proposals component should be displayed in the participatory process menu.
? Global settings:
- Voting limit: Select, if applicable, the limit of votes that a user can give.
We recommend not using this functionality for the time being, since the participatory processes launched by the Generalitat are more accustomed to deliberation.
- Check the options you want to activate for the general configuration of the Proposals functionality: Official response to proposals enabled , Official proposals enabled , Comments enabled , Geocoding enabled , and Allow attachments .
We recommend leaving the default fields enabled and enabling Allow attachments , so that citizens can add attached documents to the proposals they make.
- Warning: type it if you want to show a warning when the user is making a proposal .
- Help text when creating a new proposal: write it if you want to display it.
? Phase configuration:
- Check the options you want to activate for each of the phases: Enabled supports , Blocked supports , Hidden votes (if votes are enabled, checking this option hides the number of votes), Blocked comments , Enable proposal creation , and Official response to activated proposals.
We recommend leaving the fields enabled by default. We propose a text as a model response: "Thank you for your participation. Your proposal is being evaluated."
- Warning: type it if you want to show a warning when the user is making a proposal .

Fig. 11. Create proposals
To finish, click Add functionality .
To manage proposals, that is, accept/reject proposals made by participants during the process, click Proposals in the process submenu.
The Proposals window opens, where there is a list of all the proposals and for each one a series of information ( Title , Category , Scope , and Status, that is, if it is Accepted , Rejected , or No response ), and the possible Actions ( Reply and Preview ).

Fig. 12. Window with the proposals received
To respond to proposals, click the Reply icon, and the Reply to Proposal window will open, where you must mark Accepted or Rejected and write the reason or response you want to give in the Reply box.
Accepting or rejecting a proposal refers to whether it will be carried out or not. Therefore, if at the time of participation it is not yet known, you can keep it “Under study” with a text such as “Thank you for participating. Your proposal is being evaluated”.
If during the planning or execution phase of the public policy it is already known whether the proposal is accepted or not, the status can be changed. In this case, we recommend that you always explain why it is accepted or not.

Fig. 13. Responding to proposals
You can also export proposals and/or comments in CSV or JSON formats, by clicking Export in the upper right.
To configure the participatory budgeting functionality, in the process submenu, click Components , then Add component in the upper right part of the window and select Budgets . The Add functionality: Budgets window opens. The fields must be filled in:
- Name: name of the functionality.
- Order: corresponds to the order in which we want the component to be displayed in the process menu.
- Global settings :
- Total budget: select the figure from the drop-down.
- Percentage of minimum budget to vote: select the percentage from the drop-down.
- Comments enabled: Check to allow comments.
- Warning: Type this if you want to display a warning.
- Phase configuration ; for each phase, check the appropriate options:
- Comments blocked : Check if comments should not be allowed.
- Supports enabled : collecting supports (votes) for projects is allowed.
- Show votes: shows the number of times a project has been selected
- Warning: Type this if you want to display a warning at some stage.
To finish, click Add Component .

Fig. 14. Create budgets
Once the budget functionality is configured, the projects that will be voted on must be created. In the participatory process submenu, under Components , select the name you gave to the functionality), and click New . The New result window opens. The fields that appear on the sheet are the following:
- Title
- Description
- Budget
- Scope: Select the scope from the drop-down menu.
- Category: if applicable, select the category from the drop-down menu (which must have been previously created when generating the participatory process).
- Related proposals: select the proposals that are related to the project.

Fig. 15. Budgets
To edit the projects for voting, in the participatory process submenu, in Components select the name of the functionality.
The Projects window opens. Click the corresponding icons: Preview to see how it will look, Edit , Attachments to add documents or Delete . From this window you can also see the support that the different projects have received ( Number of votes ) and the total votes ( Completed votes , and Votes in process , that is, the participant has started voting but has not yet cast their vote).


Fig. 16. Budgets
In addition to creating the projects, you need to specify who will be able to support them. In the process submenu, click Components and the Permissions for (Budget Name) icon.

Fig. 17. Budgets
To be able to conduct surveys.
To configure the Tracking component, in the process submenu, click Components , then click Add Component in the upper right part of the window and select Tracking . The Add Component: Tracking window opens.
This functionality is enabled to monitor the results of how citizen proposals are applied to the public policy under debate.
As an intermediate proposal to work on the return and accountability with the citizens, we suggest that you prepare a first return.
This consists of demonstrating to participants that they have been listened to, that notes have been taken and that the information obtained has been worked on.
Therefore, it is highly recommended to prepare a conclusions document explaining which proposals are accepted, which are not and why. You can create this document or page with the Page functionality, under the title Return (Figure of an example of a return page).

Example figure of Return Page
For discussions. We recommend not using it, as the proposals functionality is similar and, in addition, it allows the traceability of proposals.